![]()
Chatbots have been all the buzz these days. You see them in abundance in different social media and e-commerce websites. What might be the reason for this sudden surge in chatbots? Why are they getting so popular? Chat bots are an increasingly popular way for businesses to allow customers or internal staff to interact with information in a more conversational way. Bots help consumers find solutions without using forms, cluttered inboxes, or wasted minutes spent searching and scrolling through content.
But how can we create a chat bot in just few minutes ? That’s the question we will answer in this article.
Build a bot in minutes
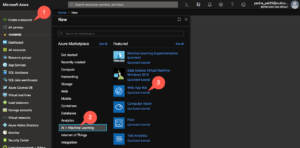
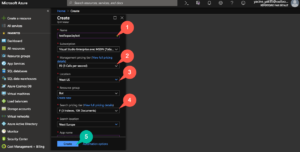
First, go to the Azure Portal then, Create a resource -> AI + Cognitive Services -> Web App Bot
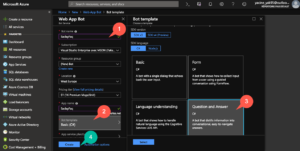
Second, in the Web App Bot Blade, fill all the mandatory fields, Bot name, resource groupe…etc.
Click on “Bot template” and choose a template for your Bot (Be sure to select the “Question and Answer” as the template for this tutorial ), and then hit “select” and “create”.
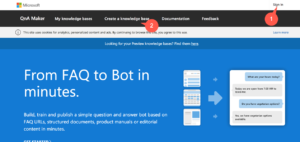
While the bot is deploying, open a new tab and log in to QnA Maker (you will need to sign in with a Microsoft account) when we are going to create a data knowledge source for our Bot.
First we need to create a QnA Cognitive Service, Create a knowledge base -> AI + Create QnA service.
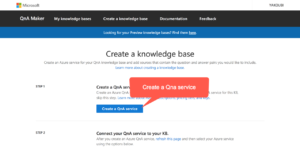
This will take you to the Azure portal to set up the service. Fill in the mandatory fields and hit “create”.
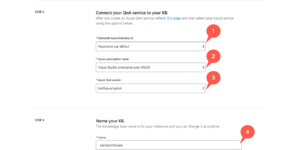
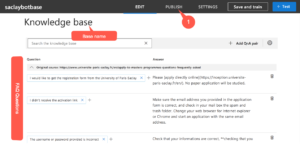
The service will start deploying, when it’s done refresh the QnA Maker page after which you should then be able to select the appropriate Active Directory ID, subscription, QnA service you just setup and then name your Knowledge Base (KB), as below.
scroll to steps 4 and 5 to give your QnA Service an FAQ site you want to crawl for question and answer pairs (It’s also possible to use a file as a data source).
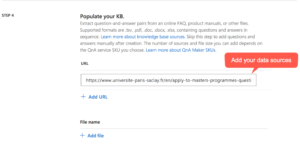
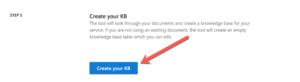
Hit “create your KB”.
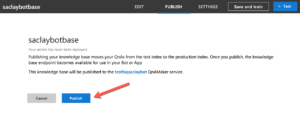
After a period of time, the knowledge base will be created and then we will publish it as below as below.
On the review screen, hit publish again.
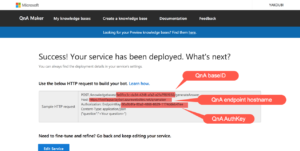
Now that we have our knowledge base published, we will need to our bot visible as a channel. For this we will need three values (QnAKnowledgebaseId, QnAEndpointHostName, and QnAAuthKey) which will be available in the screen once the KB published.
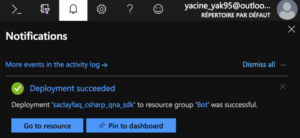
Meanwhile, our web app bot has probably deployed. From notifications, hit “Go to resource” for the web app bot we created at the first step. Leave this windows open.
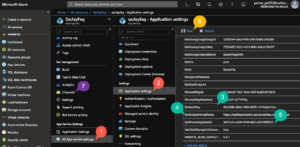
In the resource, hit “All App services settings” -> Application settings.
Scroll to the bottom of application settings, where you will see fields for QnAKnowledgebaseId, QnAEndpointHostName, and QnAAuthKey. Enter the corresponding keys from the other (QnA Maker) window that you have left open, then hit save.
Hit “Save”, then “Channels” in the blade of the ressource. Hit “Get bot embed codes”.
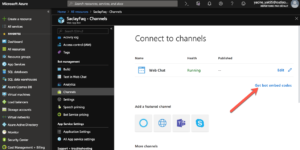
Then, open the Web Chat configuration page.

In the configuration page, click on “show” to reveal one of the secret keys (either will do).
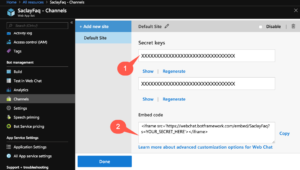
Copy the contents of the “embed code” text box to somewhere else, and replace “YOUR_SECRET_HERE” with the secret key as below (you can also leave the iframe tag if you want to embed it in a web page).
![]()
Copy the link to your browser. and click “enter” to interact with your Bot online.
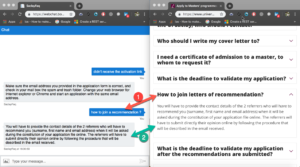
You’ve now set up your chatbot!
Well explained my friend !
Thank you !
very good work Yacine !
Thank you Ghani !