
Machine & Deep Learning are undeniably one of the most influential and powerful technologies in today’s world. As i said in my previous article Machine Learning Introduction, the goal of machine learning is to understand the structure of data and fit that data into models that can be understood and used by people and machines as well, in other words Machine learning is a tool for turning information into knowledge. In the last few weeks, I have had several people contact me about their enthusiasm for venturing into the world of data science and using Machine Learning (ML) techniques. The thing that held my intention is that many people think that to use machine Learning you have to be a mathematics and developer guru ! And here comes Microsoft with Azure Machine Learning Studio !
Azure ML Studio is a Drag-and-Drop tool that you can use to build, test, and deploy predictive analytics solutions on your data.
In this article, we will see how Microsoft is making Machine Learning accessible to everyone and how it’s possible to solve a real world machine learning problem only with Drag & Drop !
For this, we will create a sentiment analysis model that will tell us if a tweet contain a positive or a negative sentiment.
1_ Visit Azure ML portal, and then sign in or sign up for a free account
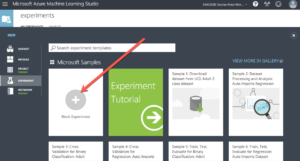
2_ Once logged in, we will have the following screen, click on “New” to create a new project,

3_ Create a “Blank Experiment”,
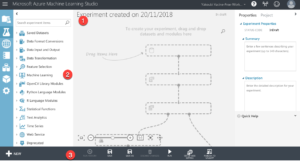
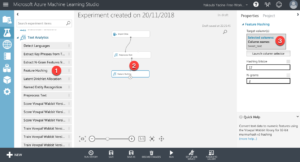
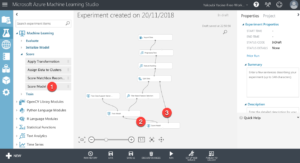
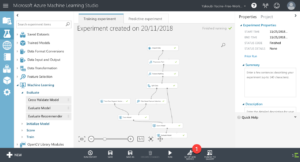
4_ After creating the blank experiment, we will have this display, click on the area 1 to give a name to your experiment. Area 2 contains the different operations and algorithms that we will use in the experiment and the 3rd area is used to save, run and publish the experiment,
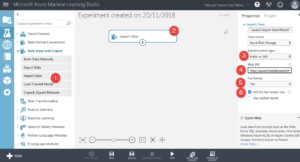
5_ In the left blade, select Data Input and Output then drag and drop the “import Data” operation. With the import Data box selected, go to the right bled and select the same values like the following screen, with the following BlobUri,
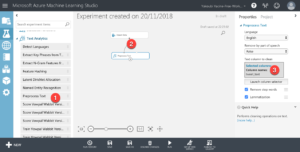
6_ Once the dataset is imported, we will preprocess the tweets in the dataset, for that go to the right blade, select Text Analytics then drag and drop Preprocess Text box. In the left blade, with the Preprocess Text box selected, launch the column selector and select the tweet_text column,
7_ Now, we will convert text data to numeric features that can be understood by our ML model. Still in Text Analytics drag and drop the Feature hashing box, and launch the column selector in the right blade to select the column that contains text, tweet_text in our case,
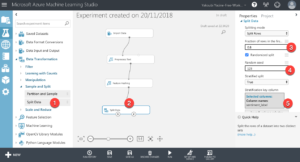
8_ Next step, split data into train and test data. For that we will use the Split Data feature in the Data Transformation section. In the right blade, select the sentiment_label column as the Stratification key column,
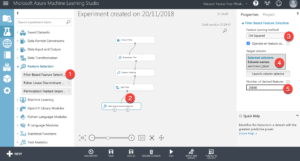
9_ Now, we will train the model to predict the right sentiment for a tweet, for that we will use only the features with the greatest predictive power. For that go to, Feature selection in the left blade, drag and drop the Filter Based Feature Selection box and select the target column to predict with the column selector which is the sentiment_label column in our example,
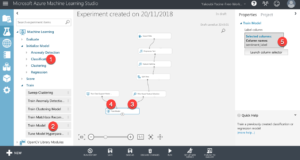
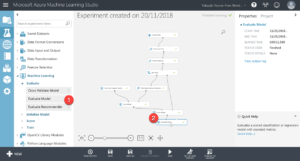
10_ Let’s train the model, for that we will use a two-class classifier since we have only two labels, “positive” and “negative” tweets. Go to Machine Learning in the left blade, select Initialize Model and drag and drop the Two-Class Support Vector Machine algorithm in Classification algorithms. Once done, go to Train in the Machine Learning section, and drag and drop the Train Model box as shown below. With the Train Model selected, select the target column “sentiment_label” which is the column that will be predicted,
11_ Next step is to score the model. Go to the left blade, Machine Learning -> Score, drag and drop Score Model box, and connect it to the trained model, and the test dataset which is the second output of the Split Data,
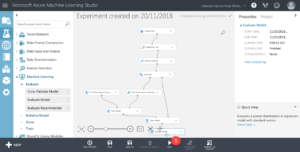
12_ With the model scored, the final step is now to evaluate it and say if the model is good or not. To do that, go the left panel, Machine Learning -> Evaluate, drag and drop the Evaluate Model box and connect it to the output of the Score model box,
13_ Run the experiment by clicking on Run !
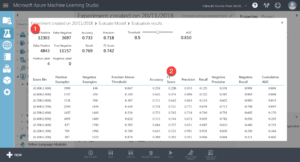
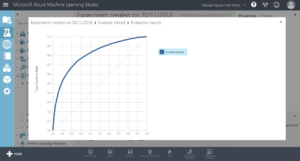
14_ We can visualise different metrics that allow us to evaluate the model by a right click on the Evaluate Model box, Evaluate Results then click on Visualize. And we will have different metrics like, the confusion matrix, Accuracy, Precision,…etc.
15_ Now that the solution is validated, let’s deploy it ! First, click on SET-UP WEB SERVICE,
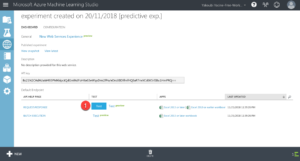
16_ Once the web service completed, we will have the display as shown in the screen below,
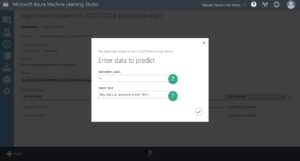
17_ To test it just click on Test and enter your tweet as in the following display !
18_ Congratulations ! You just created a Twitter Sentiment Analysis solution with ZERO Code !